There’s an image of a man with his arm immersed up to the elbow between a sheep’s hind legs, carved into the side of The Seasons Sarcophagus (335 AD) at the Dumbarton Oaks museum. The image is meant to symbolize spring and the renewal of life, although since I live in a city where dogs routinely wear sweaters, the pastoral symbolism was initially lost on me.
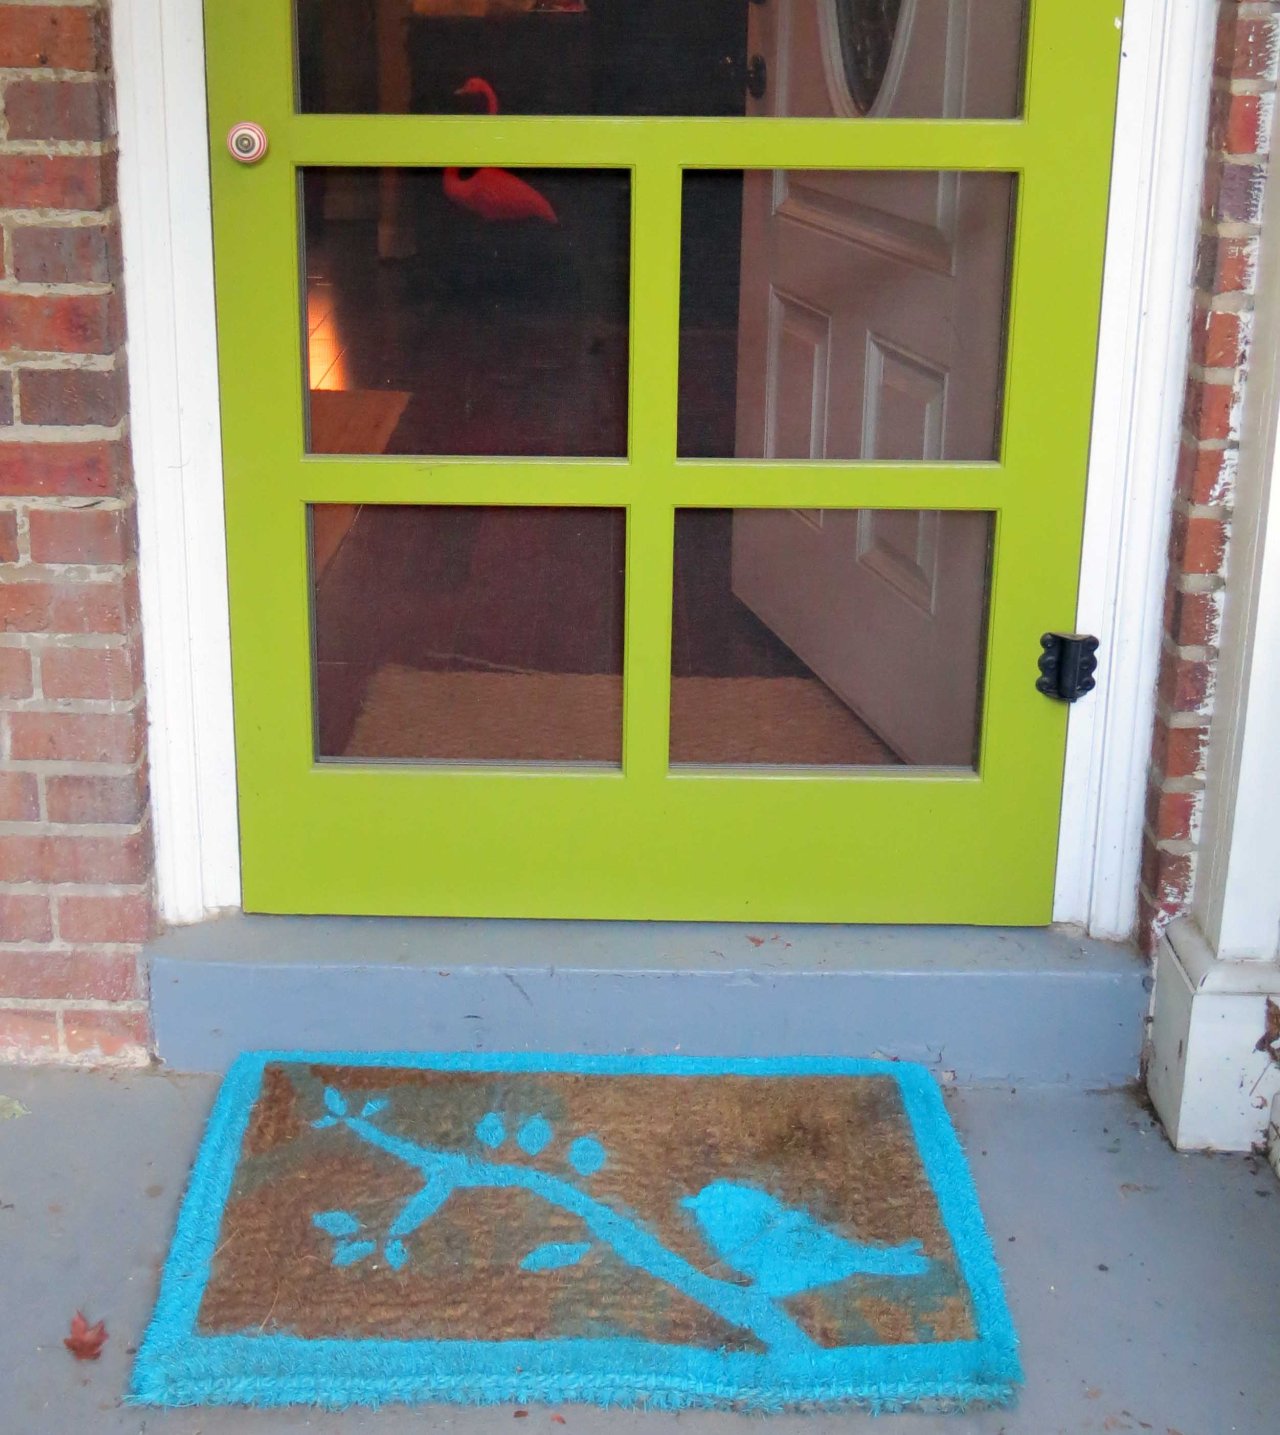
My spring tradition is simpler than birthing livestock. All I do is replace my front doormat. Maybe your doormats have a longer lifespan than 365 days – perhaps your porch roof is less leaky, or you aren’t bringing as many bikes in your front door. But for me this is has become an annual tradition, and it unfolds pretty much the same way that Christmas shopping does. I look at things obsessively online. I forget about it. I buy on impulse.
The only place to buy a doormat on impulse in my neighborhood is Target, about a half mile away. Have you ever walked home with a coir doormat? It’s awful. It’s scratchy and you can’t roll or fold it. So you have to choose between and carrying it against your skin, or trying to shove it into a plastic bag which it will tear when you are halfway home.
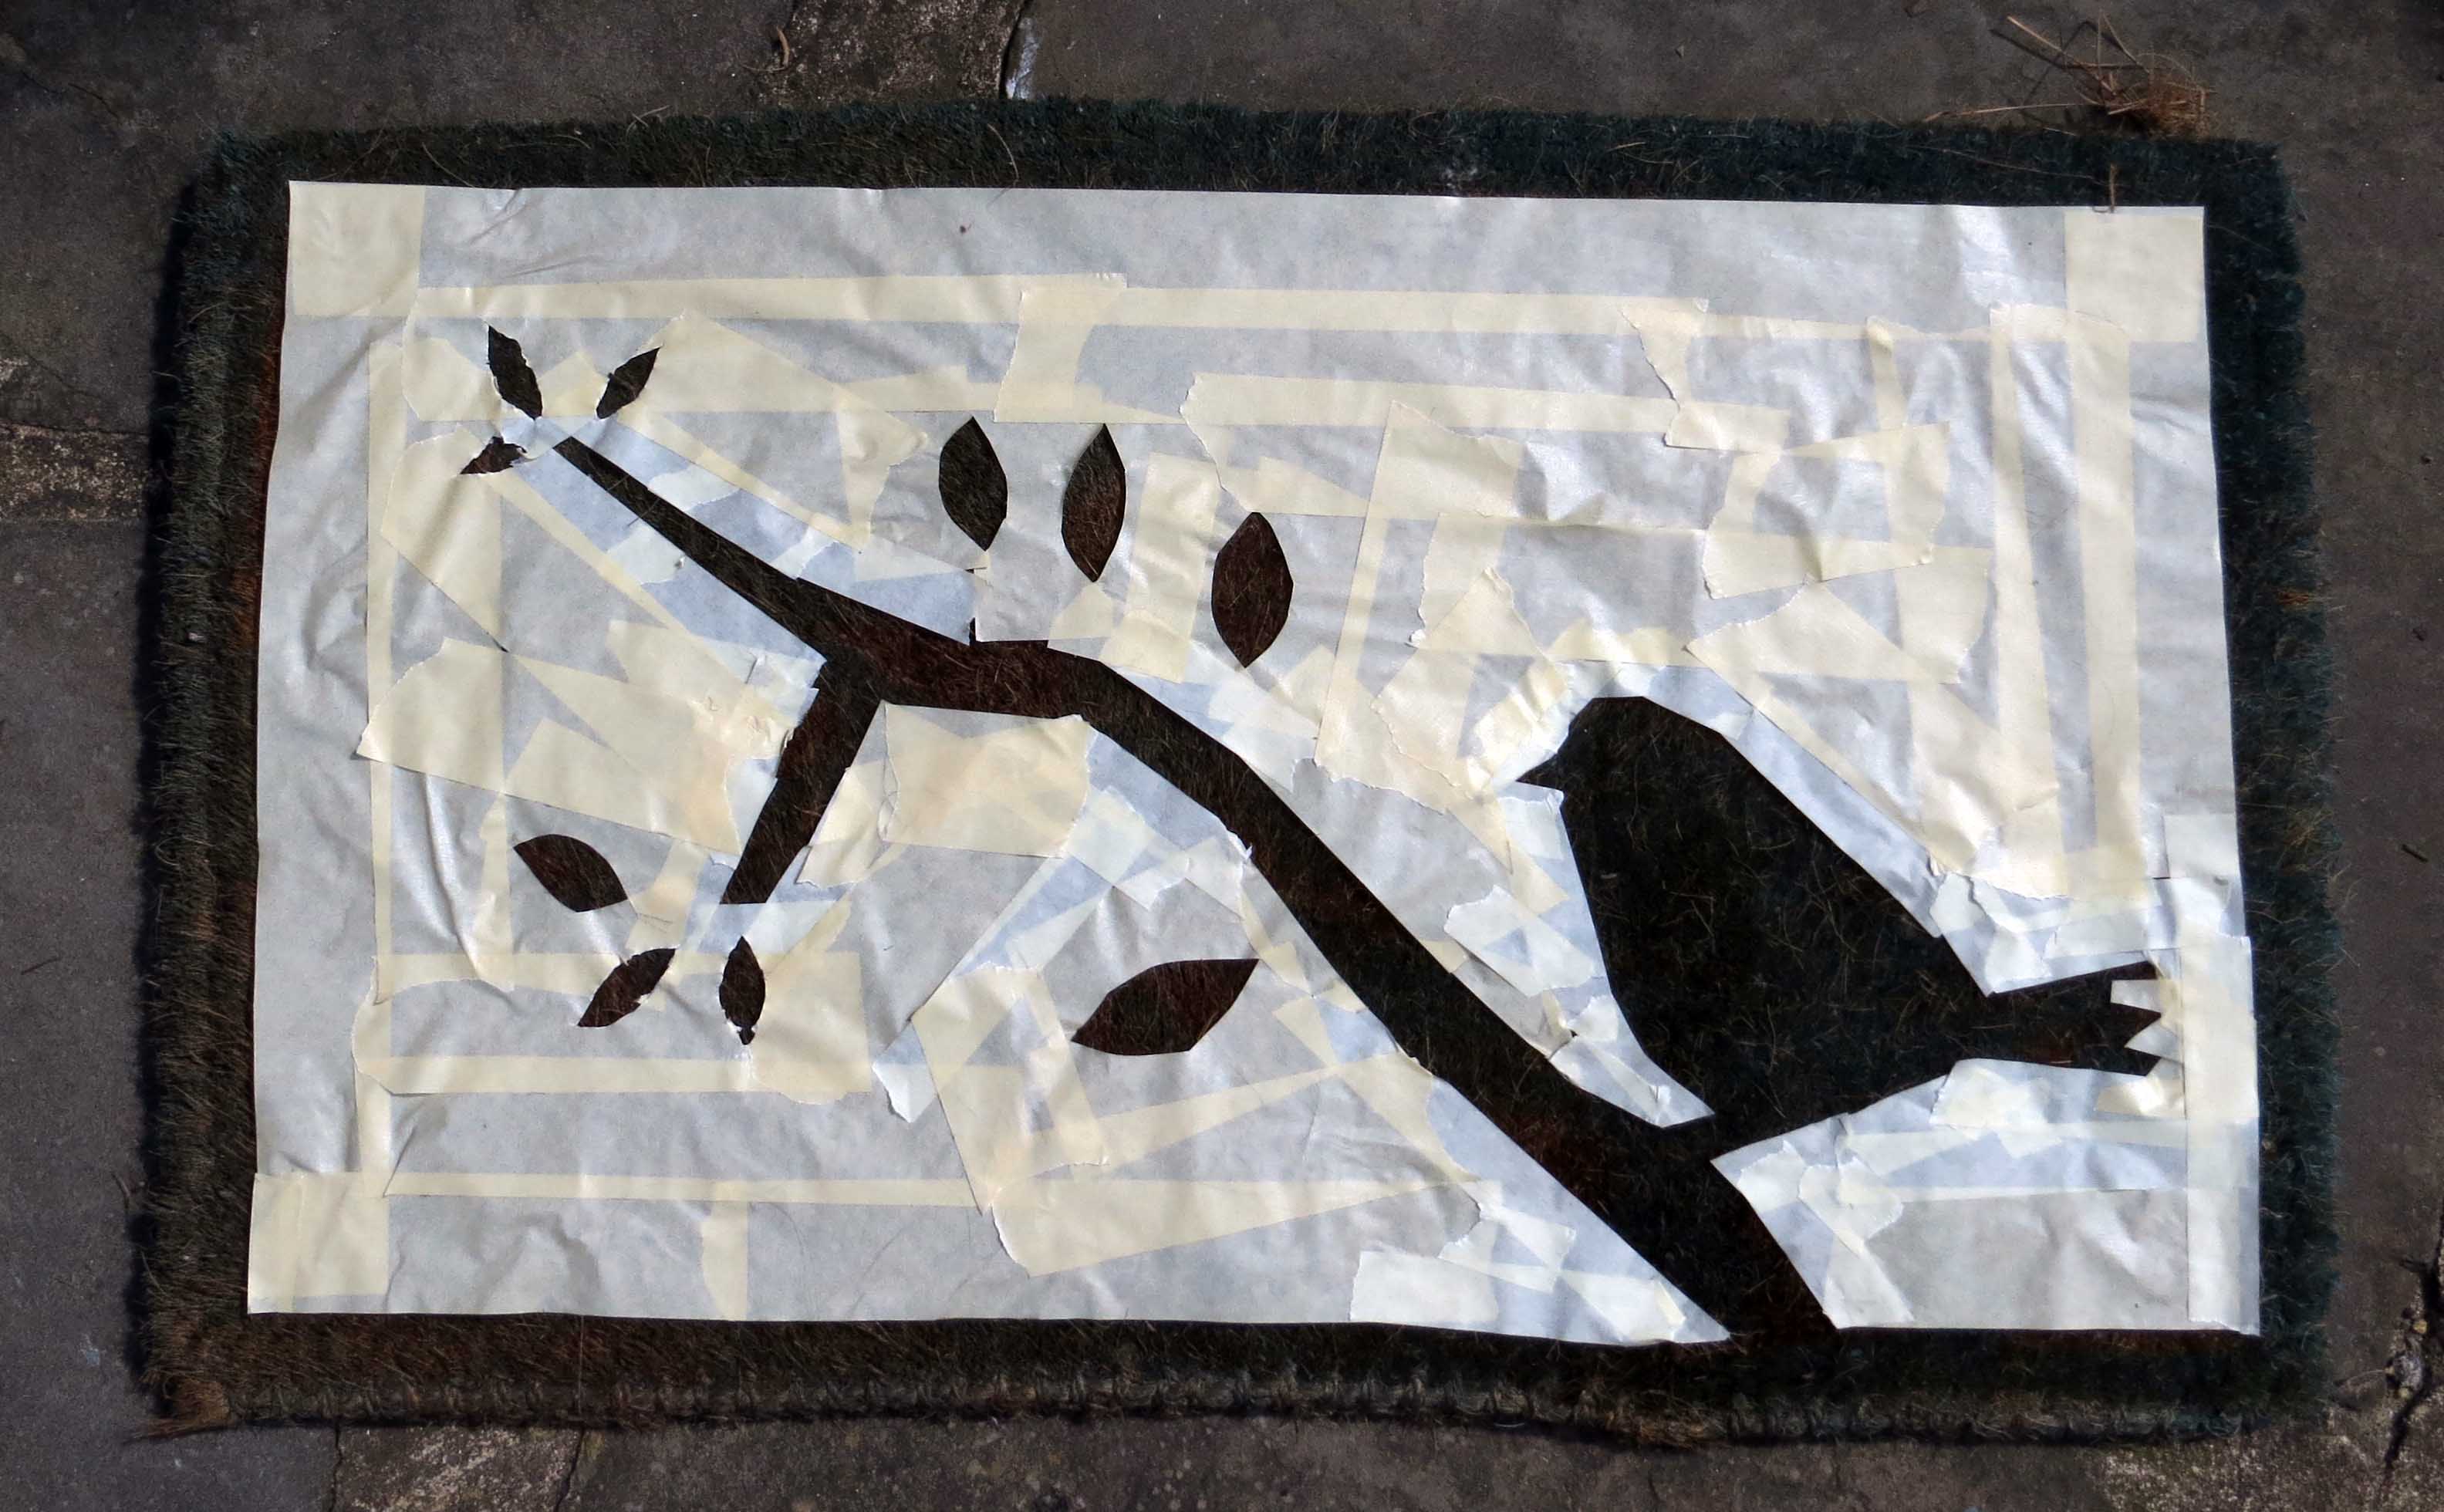
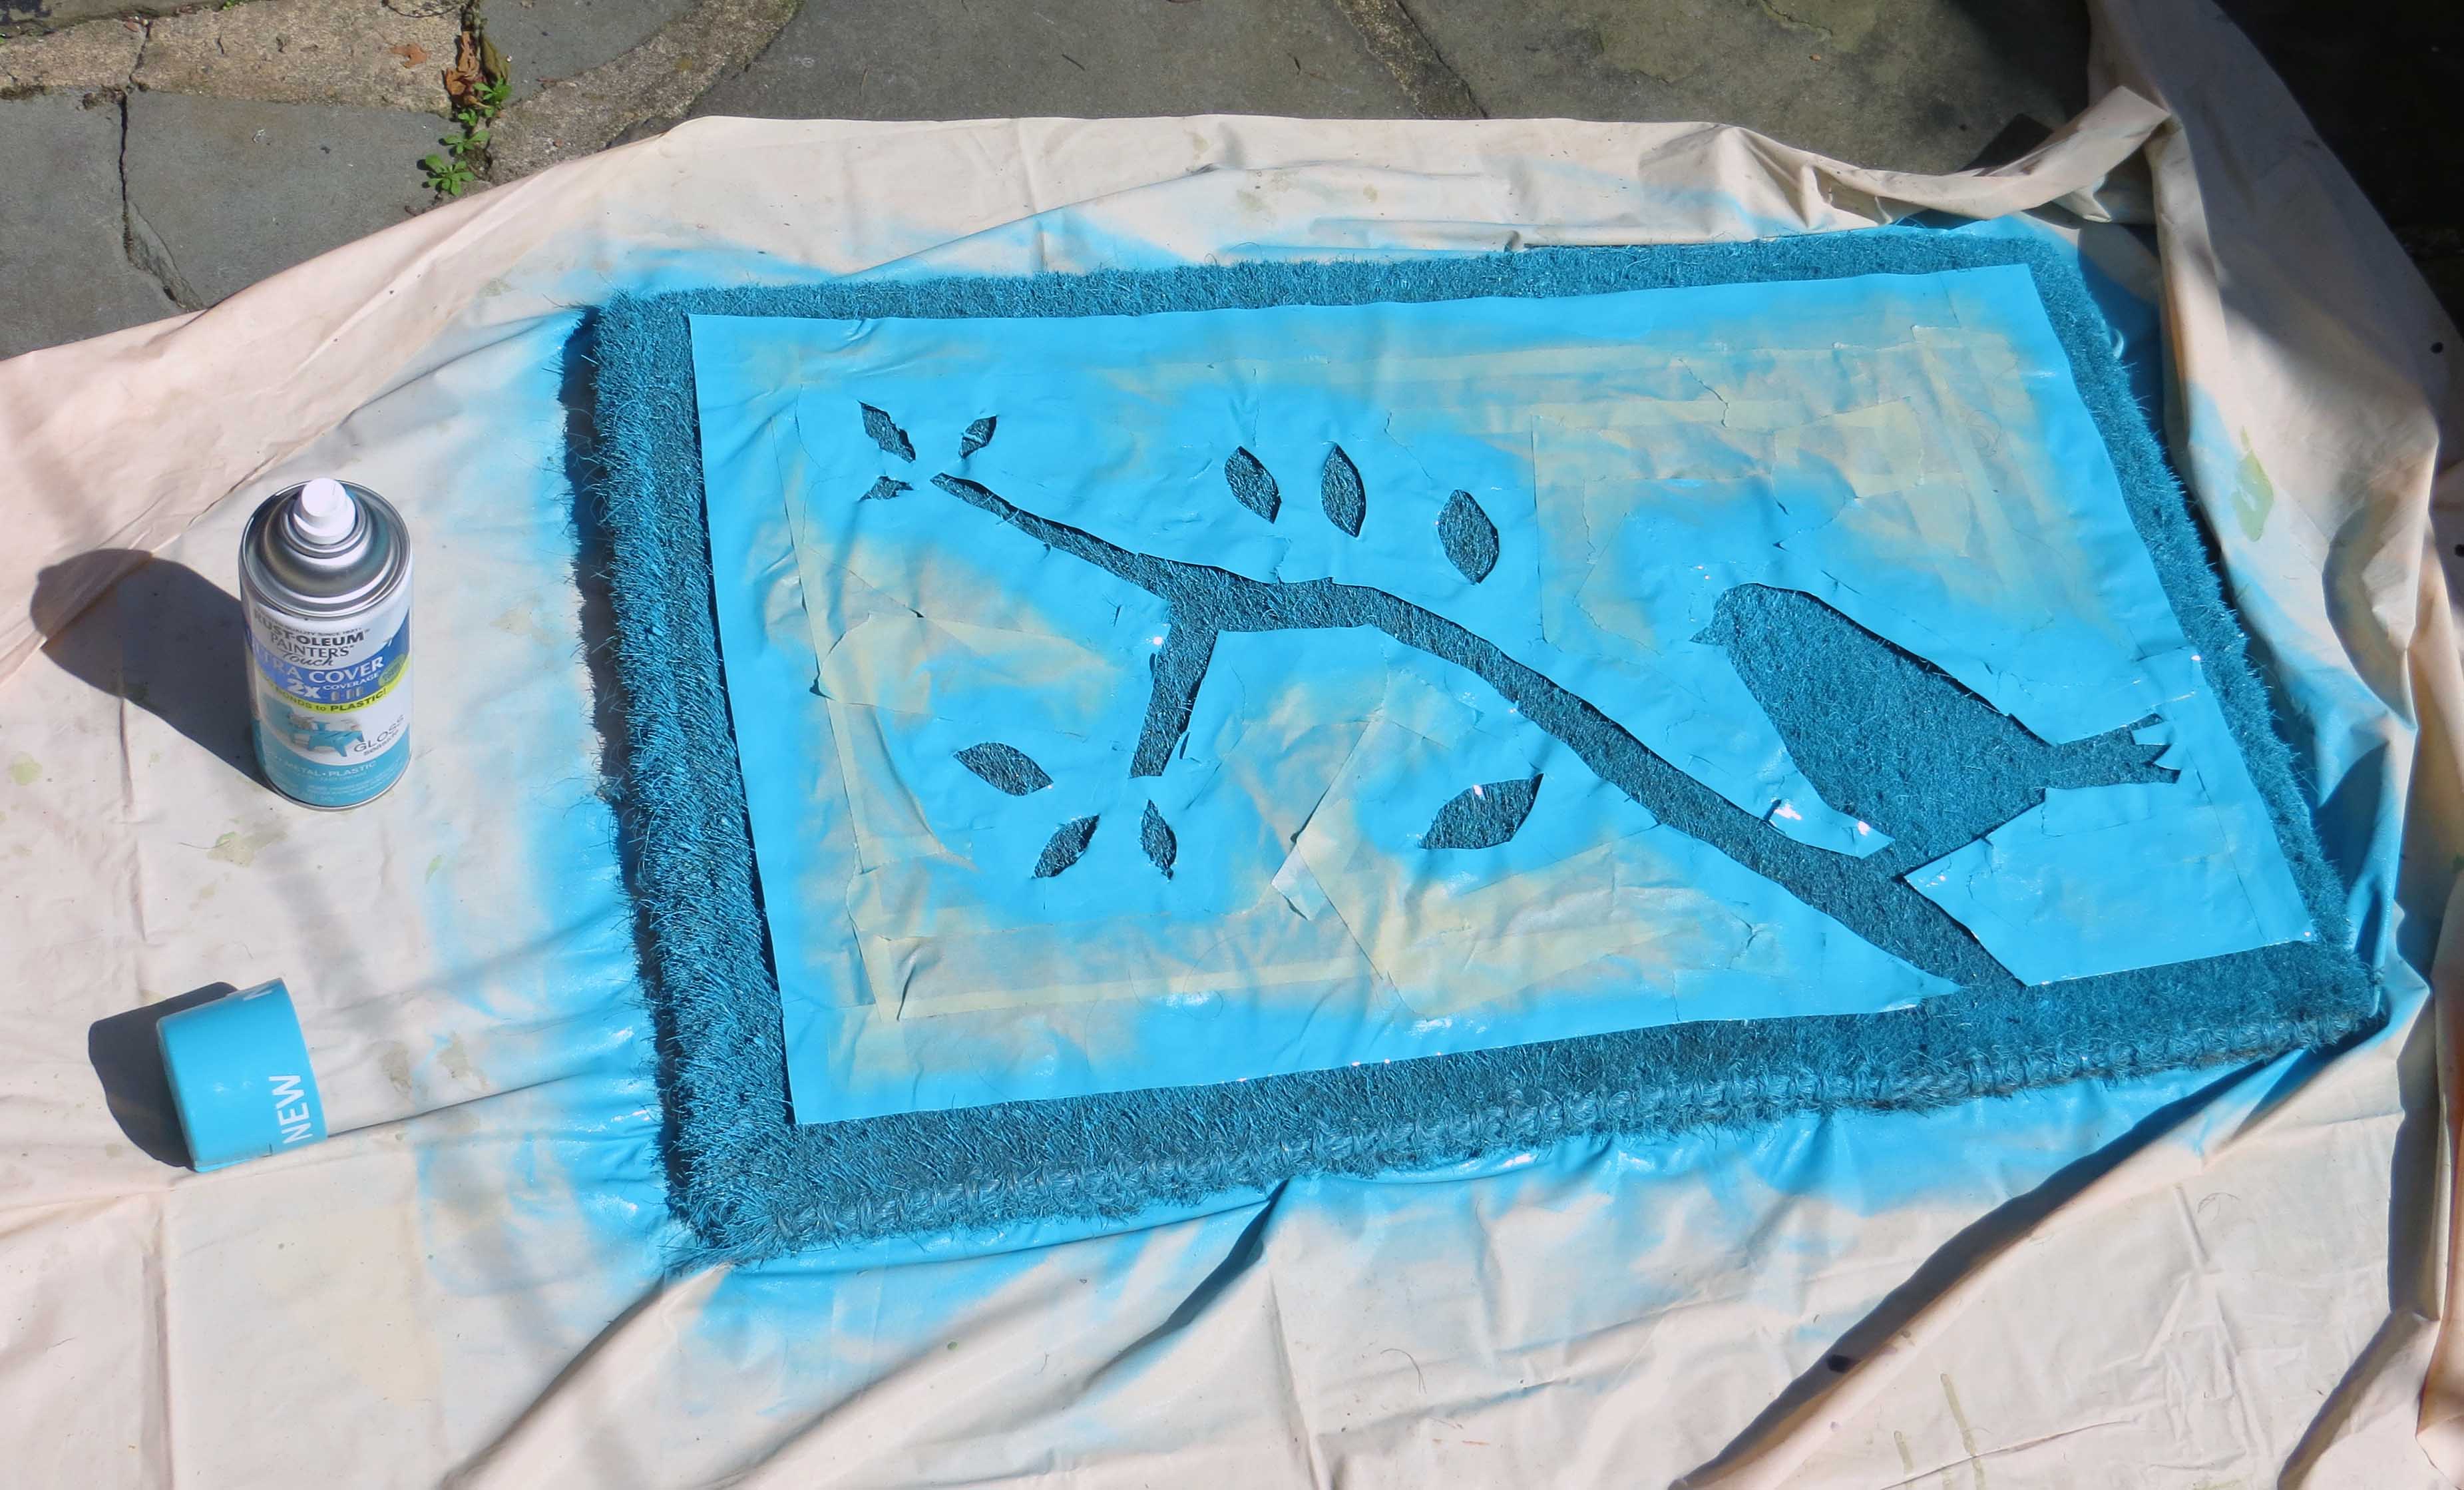
This year, I was inspired by my students who are fascinated by graffiti art, and by extension stencils and spray paint. I realized that the mat is actually in pretty good shape, it is actually just the image that needed renewal. So here’s a step-by-step guide in case you want to redo your own doormat. It won’t be perfect, but it might save you twenty bucks, a little consumerist guilt, and an uncomfortable walk from the store. You can see in the final result that the original image from the doormat, which was green, is still there a little bit. That didn’t bother me.
You will need: doormat, scissors/knife, masking tape, something to protect the ground, spray paint
- Brush stray coir hairs off of the mat.
- Use tape to design your image. Blue painter’s tape didn’t work, but masking tape worked great. In retrospect, I wish that I had planned out the image a bit better, I just freehanded it. I used scissor and cut the tape before putting it down. I also cut out a few more pieces with an X-Acto knife. You could also try to redo the original image by taping around it.
- Put down a drop cloth or something to protect the ground outside. I used an old shower curtain. Spray the image. A lot.
- Let it dry before removing the tape. I didn’t do this. It didn’t affect the doormat, but there is a blue thumbprint on my doorknob now.


Bluest bird in the entire “city where dogs routinely wear sweaters.” Much more spring/renewal oriented to my eyes than the sarcophagus you described. Much much more.
I can practically feel that doormat scratching against my skin from your description! But I love the artwork – it changes the mat completely and really brightens your entryway.